
Encaustic: Basic Studio Setup
In this blog post we look at the basic requirements of setting up your space for success. We will cover - materials & tools, ventilation, electrical requirements, and design.

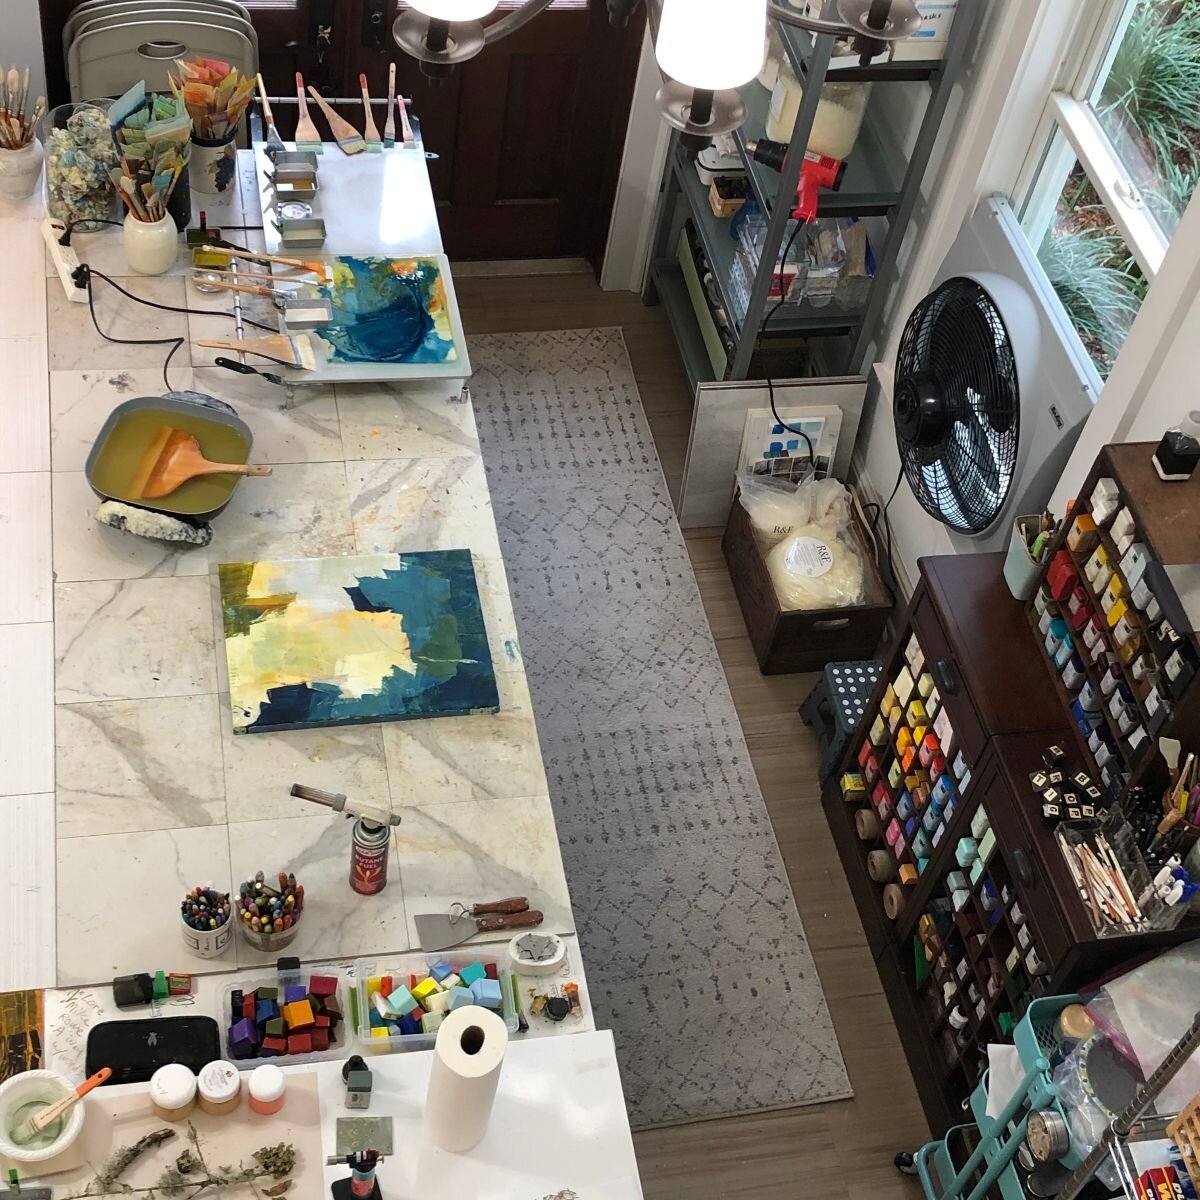
R&F Core Instructor Jodi Reeb’s studio.
BASIC MATERIALS & TOOLS
Heated palette to mix encaustic paint and medium on with temperature control (R&F makes a 12" x 12" and 16" x 16" palette).
Palette surface thermometer to assist you in keeping the temperature of your palette within a safe range (180 - 200°F).
Heat gun or Butane torch.
Tools for manipulating wax.
Supports to paint on – rigid, porous and heat resistant.
Clean, natural bristle brushes (do not use synthetic brushes, they will melt).
Cloth rags or lint free paper towels for clean-up and polishing.
Wax paper to protect and transport finished paintings. Wet Wax paper & Parchment paper are two great options.
Sheets or roll of paper to cover work surfaces (this protects tables from wax drips). Alternatively, a metal surface or masonite board can be used, and cleaned with a scraper (more heat resistant when using a torch).
It is recommended that you have a burn kit and a fire extinguisher on-hand for safety purposes.
And most importantly, paint! Click here learn more about our color line.
R&F Encaustic Sets & Kits include many of these items and are a great way to get started.

VENTILATION
All waxes, when they are melted– whether as candles, batik, or encaustic—release a mixture of invisible fume (in the form of tiny particles) and gases. At the proper working temperature of encaustic [below 220°F], the concentration of these fumes and gases is well below any dangerous level. Still, the emissions may cause irritation if they are not vented.
THERE ARE TWO MAIN FACTORS TO CONSIDER WHEN VENTILATING YOUR STUDIO.
Exhaust – getting rid of the contaminated air.
Makeup – replacing air that has been exhausted with uncontaminated air.
R&F Core Instructor Julie Snidle’s studio.
If your workspace is particularly well sealed, you may want to provide a source of fresh air to replace what you are venting outside. Makeup air can come from a window on an opposite or adjacent wall or from a doorway if your studio is in a large building.
LOCALIZED EXHAUST SYSTEM
Setting up a window fan in a defined work area can provide you with adequate exhaust. This is inexpensive and simple to install. It is also an easy way to experiment with your ventilation without investing much time or money. To set up this system, you will need to have a window a little higher than the height of your worktable.

Double-hung windows that slide up and down or horizontal windows that slide back and forth on a track can be easily adapted for a fan. However, if your window is a single pane or it opens outward, it may be necessary to remove the window and replace it with a panel on which a fan can be mounted.
All areas between the fan and the window frame should be sealed and made airtight. The more completely you seal around the fan, the more effective it will be.
Fan strength is measured by the number of cubic feet per minute (CFM) that it exhausts. Not all fans list their CFM but, a fan with several speed settings will give you greater flexibility when setting up your system.
Location of fan. The air velocity is greatest next to the fan. Therefore, the closer your work area is to the fan, the better your exhaust will be. (On the above image, the picture on the right shows the recommended scenario for directing fumes).
Ideally, your table should be lined up lengthwise against the window so that the wax emissions from your palette and your painting area will be vented adequately. To get the full effect of the fan, it should be installed so that the lowest blade point is about 3 inches higher than your palette.
A simple way to test airflow is to light a stick of incense. The smoke will tell you if air is being drawn steadily through the fan and at what distance from the fan the velocity and focus of the airflow begin to decrease. This will help you determine the best arrangement for your work area and the most effective design for a baffle if necessary.
The airflow velocity should be strong enough that, with your head over your palette, you cannot detect the odor of the melted wax. Since the emissions from heated wax are odorant, it is easy to detect if you are breathing them in. If you have been working with encaustic for a long period and have become accustomed to the smell have someone else double check for odor.

DUCT SYSTEM
If you do not have easy access to a window, you may need to have some ducting installed to remove contaminated air. In this case you may want to consult an HVAC technician.

ELECTRICAL REQUIREMENTS
A dedicated 20 amp circuit is necessary for each work station, which will power one electric palette and one hot air gun. If you plan to draw more electricity, for tools or items such as additional heated encaustic medium vats, please contact an electrician for specifications.
TABLE SETUP & STORAGE
You will need a level counter or worktable to put a heated palette on.
While there is no set standard for table size when designing your studio (provided you can access your heated palette and have ample workspace), the measurements seen in the image below work well for the majority of our students.
Your workspace should be located near an electrical outlet, so your heated palette and heat gun can be easily plugged in.
Sufficient storage for your materials is necessary. Clearly labeled bins are very helpful. We have a rack for your brushes in our workshop room.
For tips on storing the encaustic in your studio, please see here.
Shelves or a hanging system so you can stand back and look at your work throughout the painting process.

Printmaker David A. Clark’s studio.